
Using the Help Desk
Over the past year, we have received countless requests to update our client’s lawyer websites more quickly. Requests have also been made to make it easier on clients to relay information and be informed on the progress of the update. Furthermore, clients have also mentioned that they would like their office staff to request updates easier and check the status.
We have listened to your requests and have developed the “Help Desk” to facilitate all of your update/ support requests. The Help Desk has taken several months to program and test but we feel we have a great system in place. All of our support staff are eager to work with our clients through this system.
To keep the information secure, controlled, and organized, we will only be accepting updates and support requests such as adding email accounts or fixing text, and any other technical issues through the Help Desk. Keeping a uniform, organized system in place is key in reaching the commitment of 24 hour updates.
The update request you sent can’t be handled until it is entered in the Help Desk by your firm. In a few steps, we can detail how to enter the update in the Help Desk and monitor its progress. If you need any assistance in logging in, entering a ticket or any other issue relating to the Help Desk please email us at updates@lawfirmsites.com.
Step 1

First of all, login to the Help Desk at http://www.support.lawfirmsites.com/ If you are unsure of what your username and password is, or your login is not being authenticated, email updates@lawfirmsites.com.
Step 2
Once you have successfully logged in, you’ll be taken to your Help Desk Home. From here you can view current tickets, old tickets, and your account profile. If you’ve never created a Help Desk ticket before, you may have no “Current Tickets.”

Click “New Support Ticket” to create a new Help Desk ticket.
Step 3
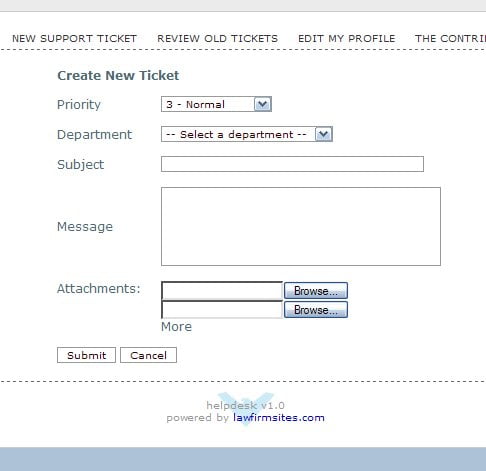
Each ticket carries a priority, a department, a subject, a message, and attachments if necessary. Set your priority, from Inquiry, Normal, or Emergency.
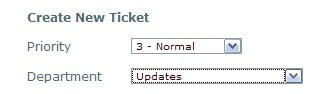
Choose your department correctly, whether it’s an Update, a Support issue, a Marketing/Optimization issue, or simply an Information inquiry.
Step 4
Detail your update by including the following:
- The filename of the page (ex. attorney.php)
- The location on the page where you would like the photo or text revision to be done
- The size of the photo, if you have a preference
- The specific text revision and location

Step 5
If you have a photo or a document to upload, click the “Browse…” button to locate the file on your desktop computer.
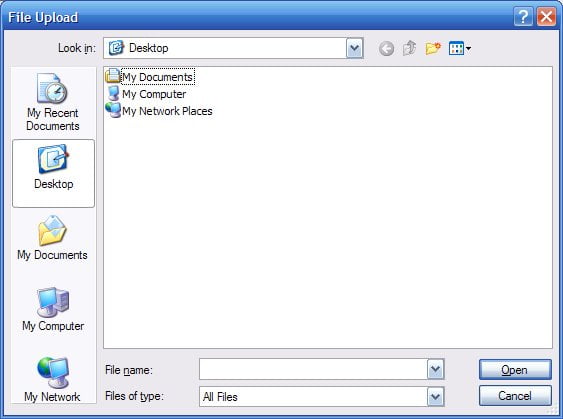
Once you have found the correct file, click open, and the attachment will appear below.
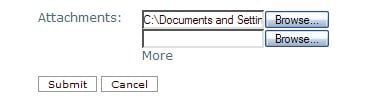
You can attach more files by clicking “More.”
Step 6
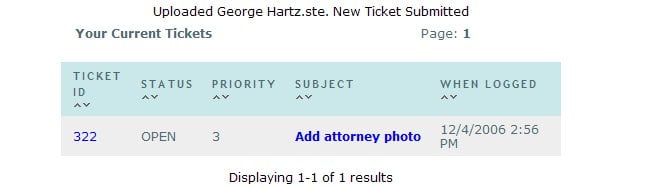
Click “Submit” to post your Help Desk ticket to our Help Desk team. You should now see the ticket and files successfully uploaded and in your “Current Tickets” pool at your Help Desk home. Here you can view your ticket ID, if you need to refer to it over the phone or by email, the ticket status, the priority, and the date you logged it.
Step 7
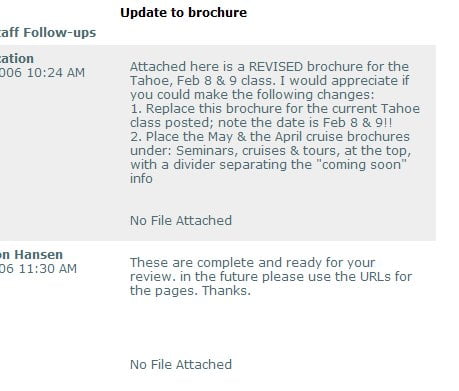
Clicking the subject or ticket number opens the ticket for you to view. Here you can see additional details. You can Print your ticket, Email your ticket, or Close it if the issue has been resolved and it hasn’t been closed by our development team. You can also “Add to Call” by adding new information, attachments, or instructions to this ticket. It’s best to add to a ticket only if you have further relevant information. If you have an additional, unrelated issue, create another Help Desk ticket.

If you’ve added to your ticket, be sure to click Save so the ticket is updated and viewed by our development team.
Step 8
You will be notified by email if a developer responds to you with a further question or notice that the update has been completed and is ready for you to review. Furthermore, you can login to the Help Desk again to respond to the ticket, view the closed tickets, and re-open previous tickets. Note that if a ticket is closed, it will no longer appear on your Home Page as a “Current Ticket.” You’ll have to click “Review Old Tickets” to see previous ticket requests.
Any inquiry can be created as a ticket, including email issues, website and server problems, technical questions, and billing details. Want to add an email address? Want to know where to see your web stats? Unsure how to set up your Outlook account? Need help stopping junk mail? Create a support ticket and rest easy knowing your issue will be responded to directly.
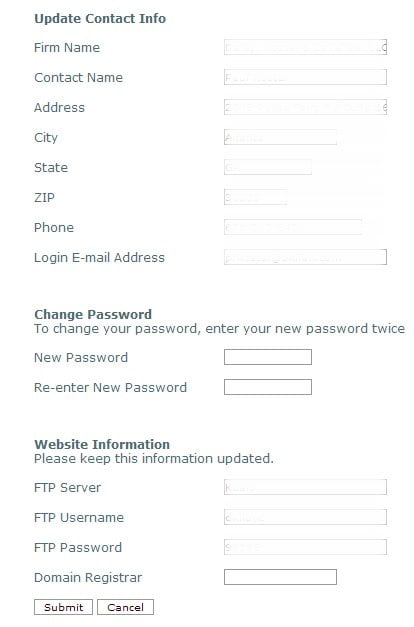
Finally, “Edit Your Profile” allows you to keep your contact information up to date, including the FTP, Registrar, and Server Information we’ll need to make your site live when the time comes. You can avoid technical difficulties by providing this information in a timely manner. Keep in mind that changing the Login E-mail Address changes the email you login with and the email ticket replies are sent to.
In addition, all future updates and technical issues should be directed to the Help Desk for the speediest resolution. It’s part of our effort to make your law firm website the finest on the web.
Did you like this post? Here are some others you might enjoy:

What makes a good design? Is it only about the appearance, or how each element serves a clear purpose? Good…
Why do some law firm websites look professional yet still fail to appear where potential clients are searching? In many…

Conversion rate optimization is the process of improving a website so that more visitors take a desired action. For law…
